Express Yourself Studios
  • Home
    • About
      • Policies/Copyright Notice
  • @EYS The Blog
    • Art Products and Fun Stuff We Love
    • Express Yourself Studios Creative Corner
  • Express Yourself Art & Co.
    • Express Yourself Studios Art Kits
    • Art for Sale
    • EyS T-Shirt Shop
    • EYS Gifts & More
  • Gift Certificates
  • Birthday Party Packages
  • Virtual Workshops
  • Children/Family Art Workshop
  • Summer Camp and Mini-Camps
    • Summer Art Workshop 2022
    • Fall Break/ NJEA Camp 2022
  • Adult Workshops
    • Workshops for Seniors
  • Private/Corporate Events
  • Contact
Workshop Fees, Product Pricing and Studio Policies Are Subject to Change Without Notice

Mums for Mom

SKU:
$5.00
5 8 $5.00 - $8.00
Unavailable
per item

Materials:


  1. 1 sheets of 8 ½ ” x 11” White Paper or Larger
  2. Pencil
  3. Paint (Watercolor, Acrylics), Crayons or Pastels
  4. Paint Brush
  5. Paint Brush 1" Foam Brush, art sponge (Or cut a clean household sponge in quarters)


Directions:


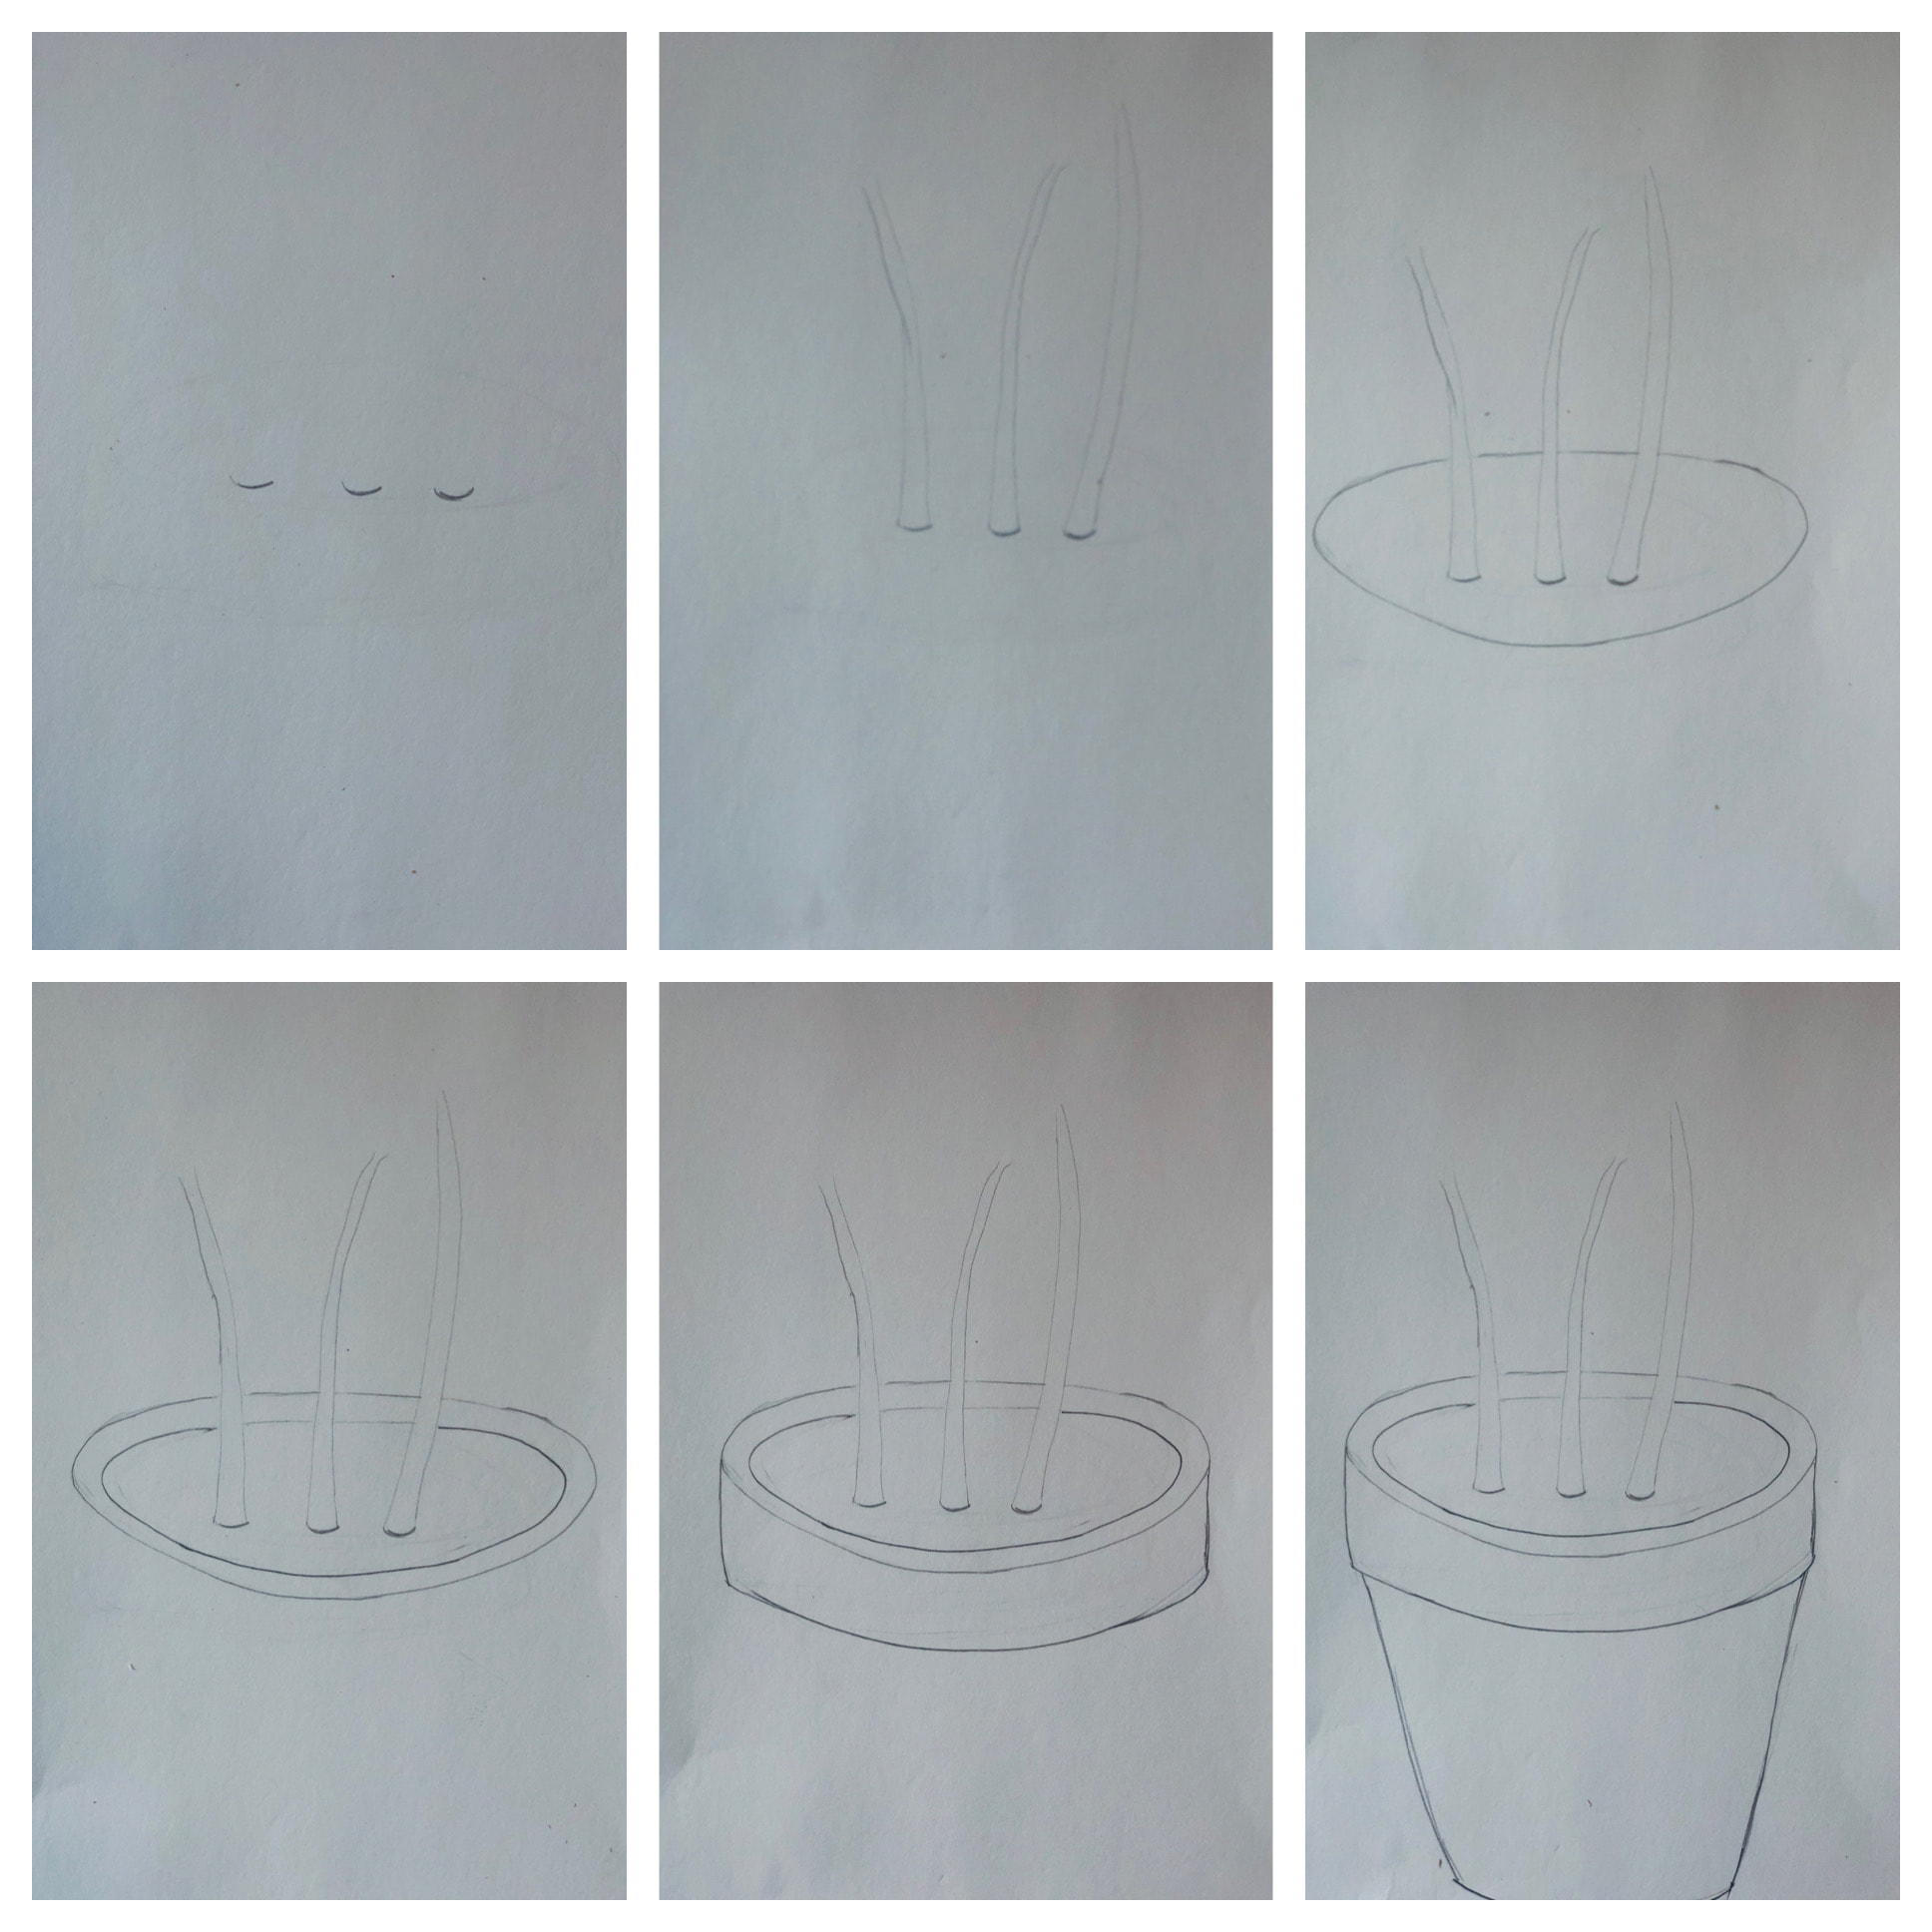
  1. With your paper in portrait position (vertical) find the top center of you paper, move down about 4 inches to the middle draw three, small, evenly spaced curved lines, use these curved lines to create stems.
  2. Now draw an oval around the stems and a second larger oval to represent the rim of the plant pot. Additionally, draw a line approximately 3 inches on the left and right sides of the pot rim moving towards the bottom of your paper. Draw a curved line at the bottom to connect the left and right sides. This completes the formation of your clay plant pot
  3. To give the impression that your pot is on a table draw angled lines on the left and right sides of the clay pot. To give the impression of walls in the background, sketch a line from the top rim of the pot to the top of your paper on the right side
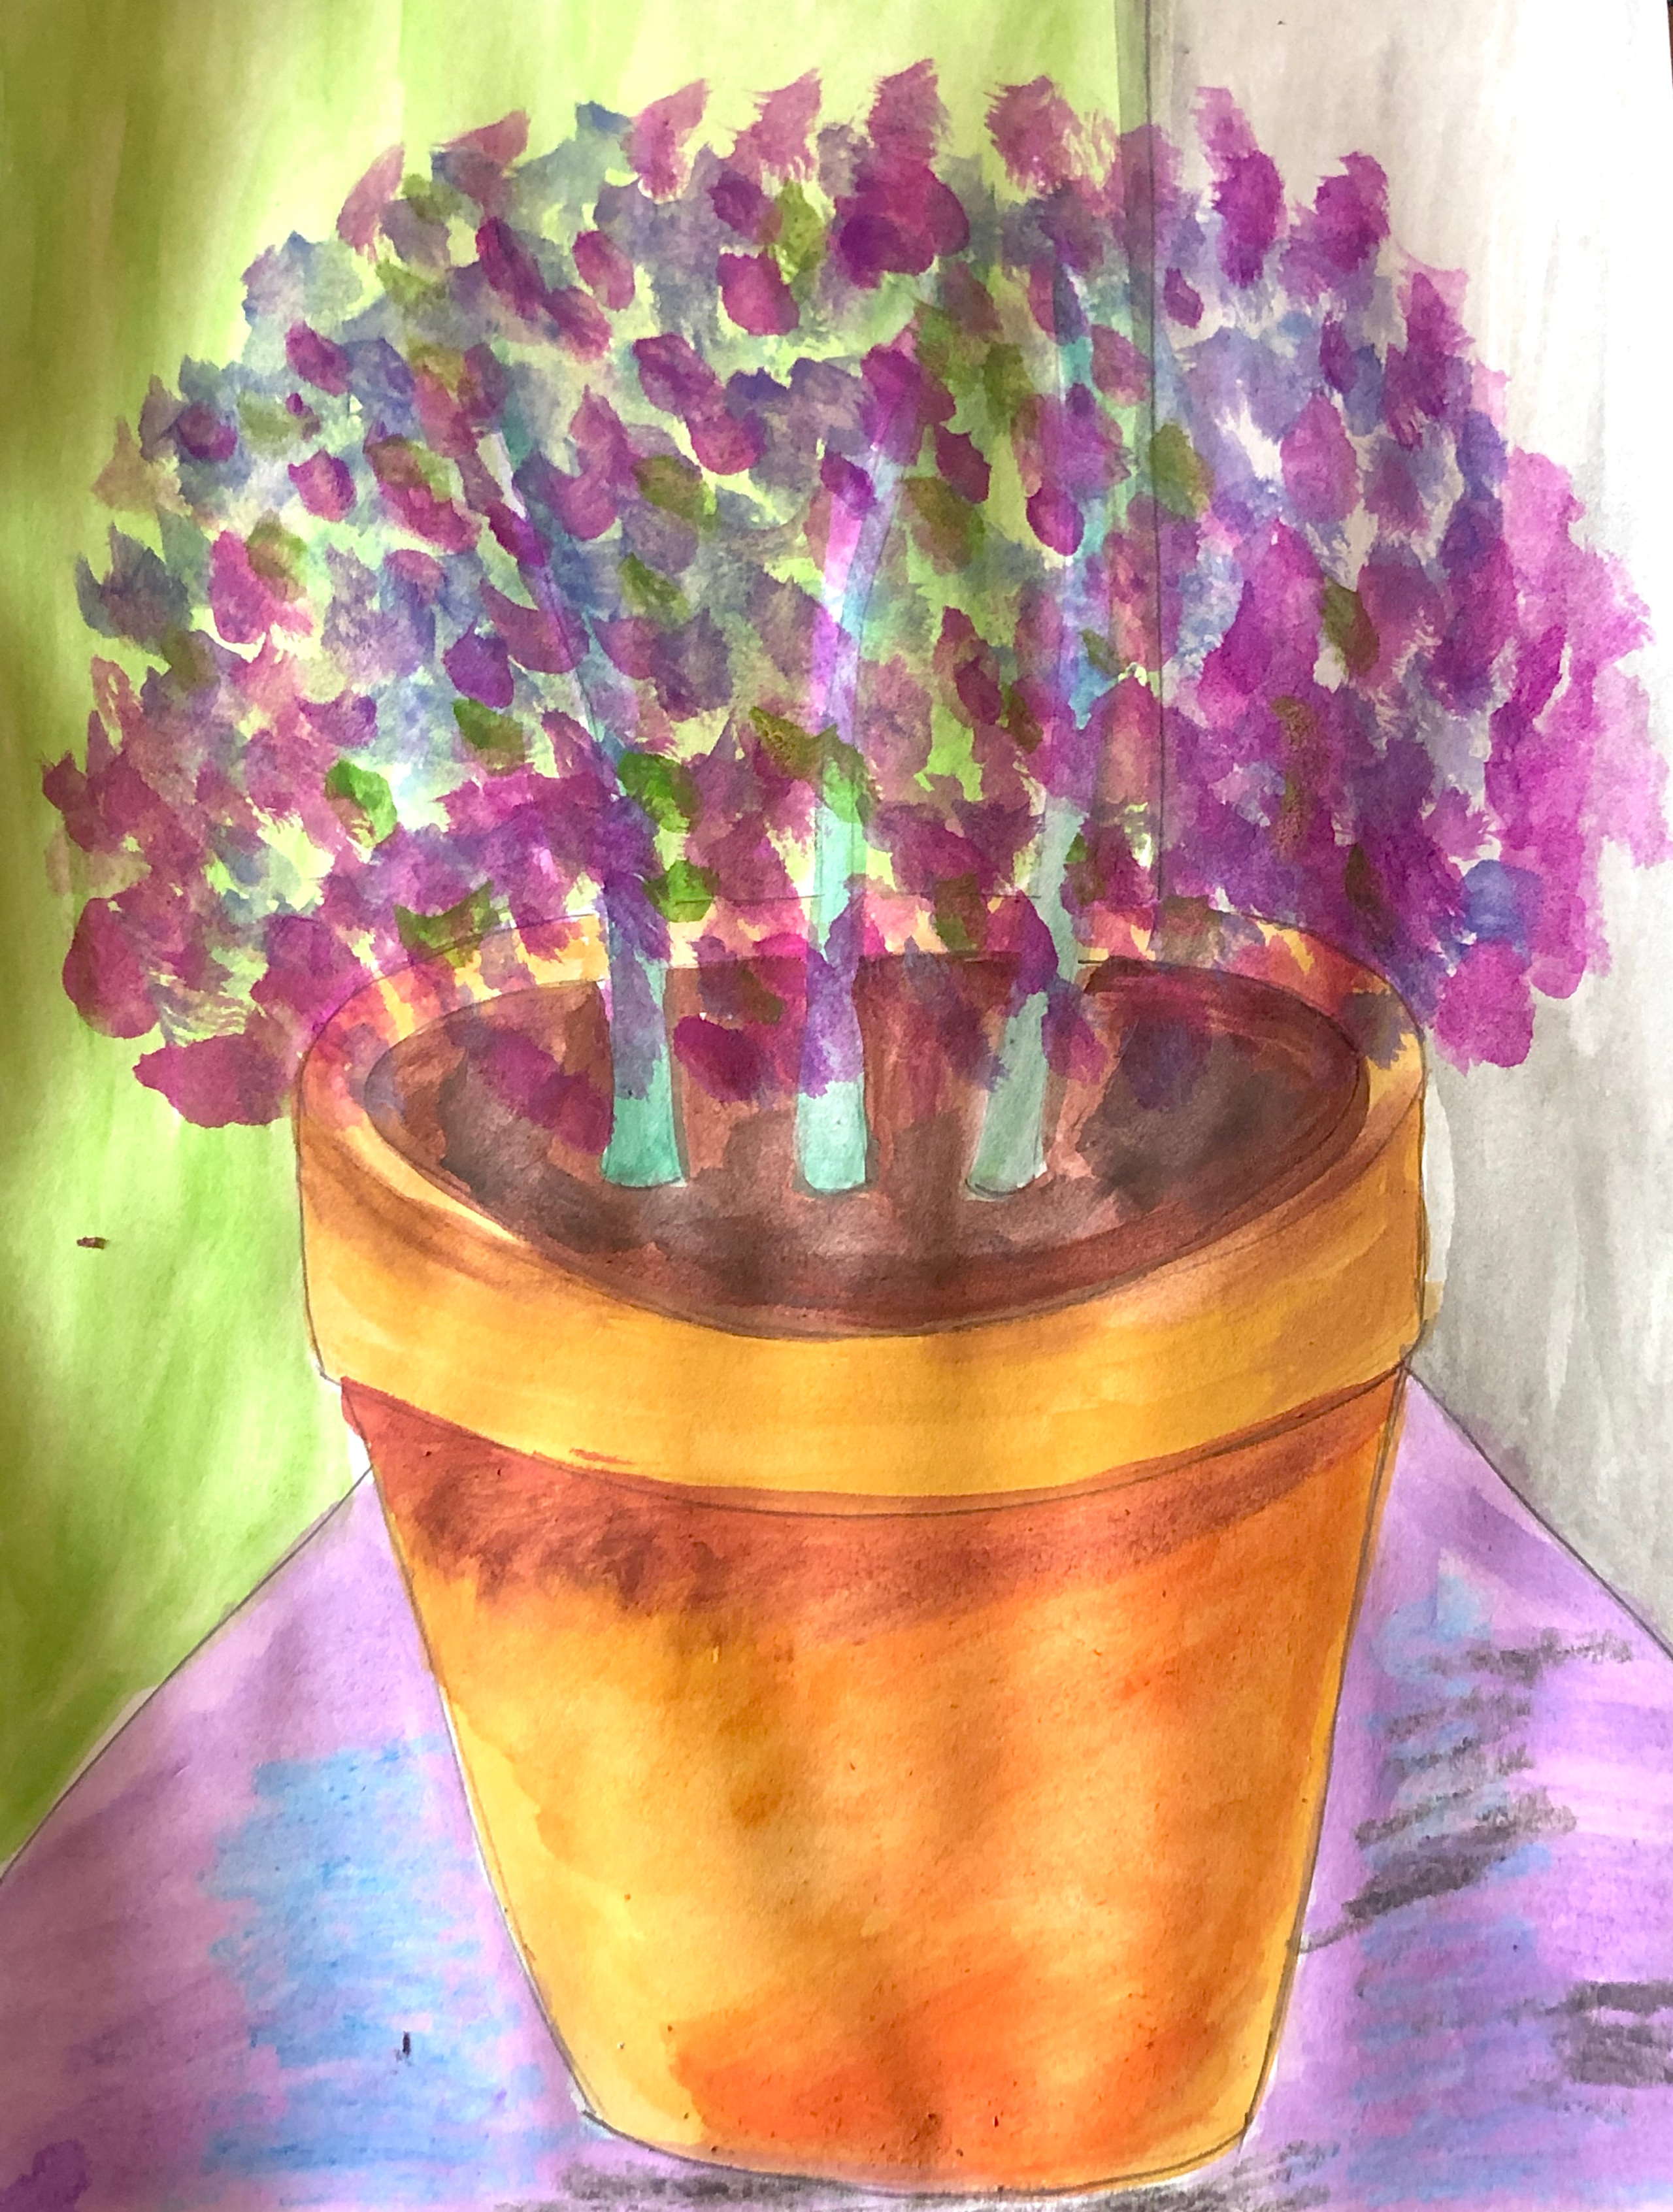
  4. Time to paint! Paint your soil (smaller oval around stems) dark brown, paint the clay pot a light brown, then paint the right side of the pot moving toward the center orange and use brown as shading just under the bottom rim of the pot
  5. Paint the upper left background area light green, then the upper right side light gray. Use a blue and gray crayon to create shadows on the "table" and finish with purple watercolor (always feel free to use colors of your choice)
  6. Paint the stems dark green and use black for shadow in the "soil"
  7. Select 3 colors for you Mum, we chose purple, magenta and indigo. Use a sponge to sponge in the paint colors, this helps to create texture


HOW TO GROW CHRYSANTHEMUMS IN YOUR GARDEN


Donations welcomed.

  • Facebook
  • Twitter
  • Pinterest
  • Google+
Add to Cart
  • Home
    • About
      • Policies/Copyright Notice
  • @EYS The Blog
    • Art Products and Fun Stuff We Love
    • Express Yourself Studios Creative Corner
  • Express Yourself Art & Co.
    • Express Yourself Studios Art Kits
    • Art for Sale
    • EyS T-Shirt Shop
    • EYS Gifts & More
  • Gift Certificates
  • Birthday Party Packages
  • Virtual Workshops
  • Children/Family Art Workshop
  • Summer Camp and Mini-Camps
    • Summer Art Workshop 2022
    • Fall Break/ NJEA Camp 2022
  • Adult Workshops
    • Workshops for Seniors
  • Private/Corporate Events
  • Contact